
The file containing the site information must be in CSV file format to import to PowerSuite.
NOTE:
It is recommended that prior to importing new files, you first export the sites and save the file, ensuring you have a back-up of your previous configuration.
To create a CSV file:
1. Use Microsoft Excel or other software which allows the creation of CSV files.
2. Create a table:
The following columns are required:
- Name
- Subnet
- Bits
3. The following optional columns may be added:
- Latitude
- Longitude
- Address
- Country
- Region
- Description
- Owner
- Tags
NOTE:
The optional columns may be beneficial if added.
Example:
- Latitude/Longitude places the site on the map.
- Tags allow viewing data for the tagged sites.
- If a geography structure is used, fields such as Country, Region allow data filtering by geography.
4. Optional custom site properties maybe added as columns. Examples include Zone, State.
NOTE:
Column order within the site table is not important.
5. Enter the values into the columns.
IMPORTANT
a. For sites
without subnets, provide only one row per site and leave the subnet and bits
fields empty:
b. Enter the subnet and bits information for the sites. The values for each subnet/bits combination for each site, is added as a separate row.

NOTE:
Optional
site information is always extracted from the first row of a site. You
may copy the optional site information field values to other rows for
completeness, but it is not necessary.
Example:
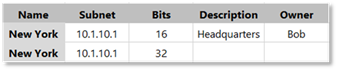
The CSV file below shows a site with one row per subnet/bits combination. The optional fields in this example are Description and Owner. The values entered into the first row of the site in this example are “Headquarters” and “Bob”:
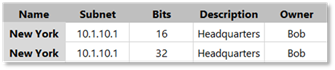
To duplicate this information in other rows of the site for completeness, you can copy the information from the first row into other rows. The following example is equal to the one above:
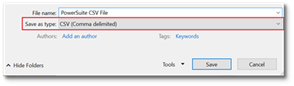
6. Save the file as CSV (comma delimited), Unicode.
a. To save the file as CSV (comma delimited) as Unicode in Windows Microsoft Excel.
i. Select CSV (Comma delimited) from the Save as Type drop down menu.
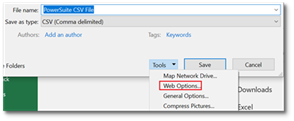
ii. Select Tools.
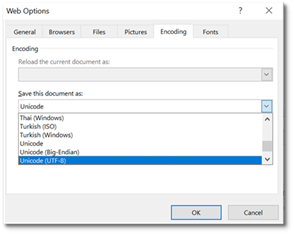
iii. Select Web Options.
iv. Select Encoding tab.
v. Select Unicode (UTF-8).
vi. Select OK.
vii. Select Save.
b. To save the file as CSV (comma delimited) as Unicode in Mac Excel, save the file as the Unicode CSV in the following format:

IMPORTANT:
If a backup of your organization’s site configuration data was carried out prior to the April 2018 PowerSuite release, it is necessary to change the column name from Site to Name.